
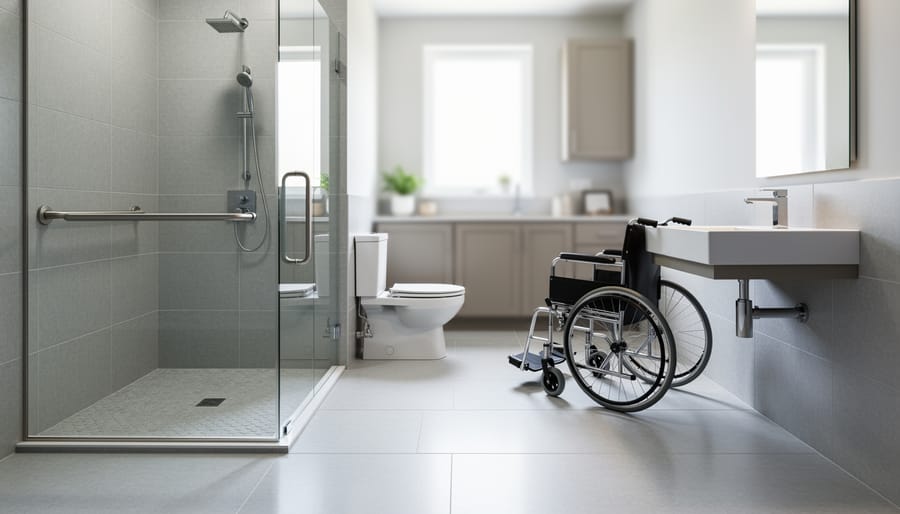
Planning accessible bathroom upgrades starts with a thorough assessment of your household’s specific mobility needs and a realistic budget of $8,000 to $25,000 for a comprehensive renovation in the Kitchener area. The most effective approach addresses three critical safety zones: the shower or tub area, the toilet space, and the sink and vanity, each requiring different adaptations based on whether you’re accommodating wheelchair use, walker assistance, or general aging-in-place needs.
Most homeowners underestimate the planning phase, jumping straight to product selection before mapping out clearance requirements and structural considerations. A functional accessible bathroom requires minimum 60-inch turning radius for wheelchairs, reinforced walls capable of supporting grab bars (blocking installed during construction), and careful attention to threshold heights and floor transitions. These aren’t decorative choices. They’re evidence-based safety standards that reduce fall risk by up to 80% when properly implemented.
The good news: Kitchener residents have access to Ontario’s Seniors’ Home Safety Tax Credit (up to $2,500 annually) and several municipal programs that offset renovation costs for accessibility modifications. You’ll need to work with contractors familiar with Ontario Building Code requirements for barrier-free design, particularly sections through, which govern grab bar placement, door widths, and fixture heights.
This guide walks you through the complete planning process, from initial needs assessment through final inspection, with specific attention to material selection, contractor vetting, and permit requirements unique to accessible bathroom upgrades in Kitchener.
Why Accessible Bathrooms Support Health and Independence
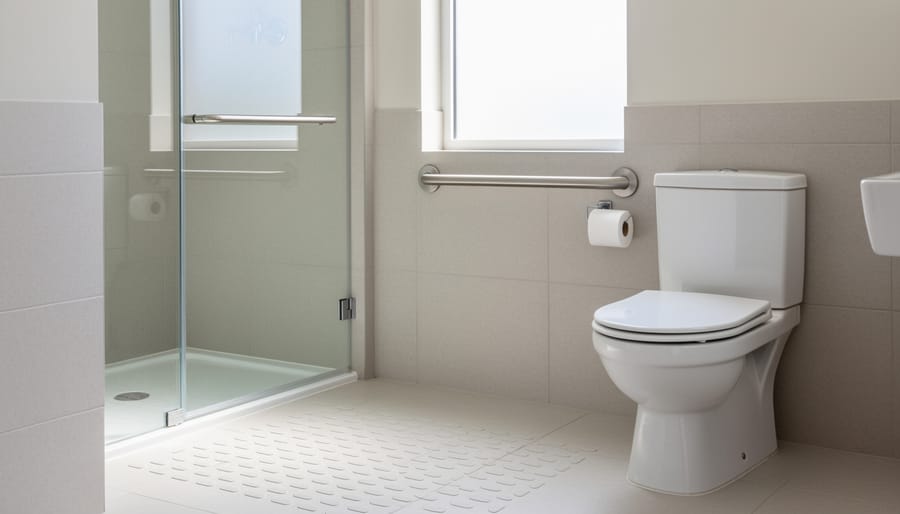
Accessible bathrooms do more than add convenience. They serve as a critical health intervention that protects physical safety, preserves independence, and supports overall wellness for people of all ages and abilities.
The safety case for accessible bathrooms starts with hard numbers. In Canada, falls are leading cause of injury-related hospitalizations among adults over 65, and bathrooms account for a disproportionate share of these incidents. Wet surfaces, awkward transfers on and off the toilet, and stepping over high tub walls create dangerous conditions even for relatively healthy individuals. Strategic fall prevention measures address these hazards directly.
Beyond injury prevention, accessible bathrooms protect independence. When someone struggles to safely use their bathroom, they face impossible choices: risk injury attempting tasks alone, depend on family members for intimate personal care, or consider leaving their home entirely. This loss of autonomy carries measurable mental health consequences, including increased rates of depression and anxiety among those who can no longer manage basic self-care privately.
Accessible design also enables consistent hygiene routines that prevent secondary health problems. Someone who avoids showering due to transfer difficulty faces increased risk of skin infections, urinary tract infections, and social isolation. A person with arthritis who cannot operate standard faucets may struggle to wash hands properly, raising infection risk. Removing these barriers supports the daily health practices that prevent more serious conditions from developing.
What You’ll Need: Tools, Materials, and Professional Support
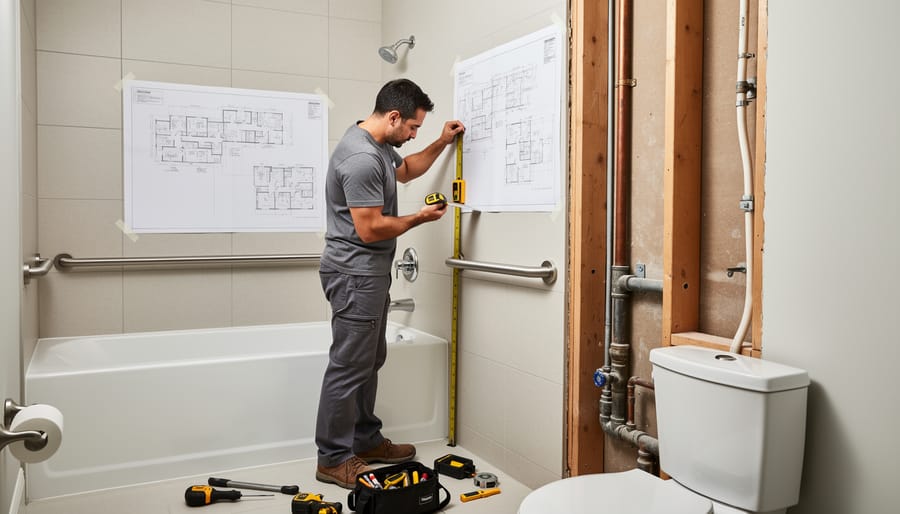
Planning accessible bathroom upgrades starts with gathering the right tools and knowing when to call in professional help. For initial assessment and simple installations, you’ll need basic equipment: a measuring tape to check doorway widths and clearances, a level to ensure grab bars install straight and secure, a stud finder to locate wall framing for proper anchoring, and a cordless drill with appropriate bits for your wall type. Stock up on heavy-duty fasteners rated for accessibility hardware, grab bars require anchors capable of supporting at least 250 pounds, not the lightweight versions used for towel racks.
- Basic tools: measuring tape, level, stud finder, cordless drill, appropriate drill bits
- Fasteners: heavy-duty wall anchors rated for 250+ lbs, stainless steel screws for wet environments
- Safety materials: non-slip adhesive strips or coatings, slip-resistant bath mats with suction backing
- Accessibility hardware: certified grab bars, lever-style faucet handles, handheld showerheads with adjustable mounts
- Professional services: licensed plumbers for fixture relocation, certified electricians for GFCI outlets and lighting upgrades, occupational therapists for personalized assessments
Know your limits. Simple swaps like replacing round door knobs with lever handles or adding a handheld showerhead are safe DIY projects. But hire licensed contractors for anything involving plumbing relocation, electrical work near water sources, or structural modifications like widening doorways or removing tub walls. Bathroom electrical requires ground fault circuit interrupter protection, this isn’t the place to learn wiring on the job.
In Kitchener, start with an occupational therapist assessment through your family doctor or contact local home healthcare providers who evaluate specific mobility needs and recommend appropriate modifications. The Waterloo Region chapter of the Canadian Home Builders’ Association maintains a list of Certified Aging-in-Place Specialists who understand both accessibility standards and Ontario building code requirements. Many contractors now offer free consultations to assess your space and provide realistic cost estimates before you commit to major work. Investing in the right expertise upfront prevents costly mistakes and ensures your upgrades truly improve safety and independence.
Safety Considerations Before You Begin
Before starting any accessible bathroom upgrades, recognize that mistakes in this high-risk environment can cause serious injury. Even seemingly straightforward modifications require careful attention to structural integrity, electrical safety, and moisture management.
Grab bars only provide safety when installed correctly. You must anchor them into wall studs or use specialized blocking rated for at least 250 pounds of force. Installing grab bars into drywall alone, even with toggle bolts, creates a dangerous false sense of security that can lead to catastrophic falls when the bar pulls free under load. If you cannot locate studs or your walls use metal studs, stop and hire a contractor who can install proper backing.
Before finalizing any flooring choice, physically test slip resistance when wet. Pour water on samples and walk across them wearing typical footwear and barefoot. What feels secure when dry can become treacherous with moisture, soap residue, or shampoo.
Ventilation directly impacts respiratory health. Inadequate airflow allows moisture accumulation that promotes mold growth, triggering asthma, allergies, and respiratory infections. Your bathroom needs either a window you can open or an exhaust fan vented to the exterior (not into the attic). Check for hidden moisture behind walls if you notice musty odours or discoloured patches.
Major renovations in Ontario, including moving plumbing, altering structural walls, or changing room layout, require building permits to ensure code compliance. Working without permits risks failed inspections during future home sales and may void insurance coverage. When your project involves structural changes, plumbing relocation, or electrical modifications beyond simple fixture replacement, consult licensed professionals rather than proceeding alone.
Step-by-Step Planning Process for Your Accessible Bathroom
Step 1: Assess Current and Future Mobility Needs
Start by honestly evaluating what you or your household member can do right now in the bathroom. Can you step over a standard tub ledge without losing balance? Do you grip the vanity edge when standing from the toilet? Are overhead shower controls difficult to reach? Write down specific struggles you notice during your daily routine, even small ones like needing both hands free to steady yourself.
Think beyond today. If you’re managing arthritis, diabetes, or another progressive condition, consider how grip strength or sensation might change over the next five to ten years. Someone recovering from surgery faces different needs than someone planning for gradual aging, but both benefit from anticipating challenges before a crisis forces rushed decisions.
Working with an occupational therapy professional or physiotherapist gives you a personalized assessment based on your actual abilities and health trajectory. They measure things you might overlook: how far you can safely reach while seated, whether your balance allows single-leg standing for dressing, how vision changes affect depth perception stepping into a shower, and whether transfers from wheelchair to toilet require specific clearances.
Document these findings in detail. Note which tasks feel unsafe versus merely inconvenient, and flag anything requiring assistance from another person. This honest inventory becomes your planning foundation, ensuring upgrades address real needs rather than guessing what might help.
Step 2: Measure Your Space and Identify Constraints
Start by measuring your bathroom doorway at its narrowest point, the clear opening after accounting for the door itself and any trim. You need a minimum of 32 inches for standard wheelchair passage, though 36 inches works better if renovation allows. Measure the floor height on both sides too, since even a small threshold can prevent wheelchair access.
Next, assess turning space. A wheelchair or walker requires roughly a 60-inch diameter circle to turn around comfortably. Mark this circle on your floor with painter’s tape to see where it fits, typically centered in the room or just inside the door. Note any obstructions like vanities or radiators that intrude into this space.
Measure clearances around your toilet. You need at least 16 inches from the centerline to the nearest wall or fixture on each side, and 21 inches of clear space in front. These dimensions matter for safe transfers from wheelchairs or walkers.
For the shower or tub area, measure the entry height and interior dimensions. A barrier-free shower needs a level or gently sloped entry, ideally 36 by 36 inches minimum for a seated transfer.
Finally, document structural constraints. Take photos of visible plumbing locations, note where walls feel solid versus hollow when tapped (indicating potential load-bearing walls), and mark electrical outlets. These factors determine which walls can accommodate grab bars and whether you can relocate fixtures affordably.
Step 3: Prioritize Key Accessibility Features
Once you’ve measured your space, rank potential upgrades by their safety impact and your available budget. This prioritization ensures you address the most critical needs first while planning for future enhancements.
Immediate Safety Priorities
Grab bars deliver the highest safety return for the lowest investment. Install them beside the toilet and inside the shower or tub where falls are most likely. Pair grab bars with non-slip flooring or bath mats featuring strong suction grips. These two upgrades alone prevent the majority of bathroom falls and cost under $500 when professionally installed.
Improved lighting comes next. Add bright overhead fixtures, eliminate shadows around the toilet and shower, and install motion-activated night lights. Poor visibility contributes to trips and misjudged transfers, especially for those with age-related vision changes.
Medium-Term Independence Features
Walk-in or roll-in showers remove the dangerous step-over barrier of traditional tubs. Budget $3,000 to $8,000 for this renovation, but recognize it enables independent bathing for years to come. Raised toilet seats or comfort-height toilets ease transfers for anyone with knee or hip limitations.
Lever-style faucets replace twist knobs that challenge arthritic hands. Accessible sink heights (typically 34 inches with knee clearance) support wheelchair users and anyone who needs to sit while grooming.
Long-Term Planning
Adequate ventilation prevents mold growth that aggravates respiratory conditions. While not an immediate fall risk, proper airflow protects long-term health and preserves your investment in accessible features.
Step 4: Research Funding and Rebate Programs
Accessible bathroom upgrades often qualify for financial support through government programs designed to help Canadians age in place safely. Start by checking the Canada Mortgage and Housing Corporation’s Home Accessibility Tax Credit, which offers a federal credit on up to $20,000 in eligible renovation expenses per year. Ontario’s Seniors’ Home Safety Tax Credit provides additional provincial relief for qualifying households aged 65 and older.
The Region of Waterloo occasionally runs accessibility grant programs for low-income seniors and people with disabilities. Contact their Senior Services division directly, as funding availability changes annually and waitlists can be lengthy. Veterans Affairs Canada offers home modification support for eligible veterans through their Independent Living Program, covering assessments and approved renovations.
Medical expenses, including certain accessibility renovations prescribed by a medical practitioner, may be tax-deductible. Keep all receipts, quotes, and medical documentation. A financial advisor or accountant familiar with disability-related expenses can help you maximize available credits and ensure you’re claiming everything permitted under the Income Tax Act.
Apply for funding before starting work, as most programs require pre-approval and won’t reimburse completed projects.
Step 5: Create a Phased Implementation Plan
Breaking your bathroom upgrades into phases prevents budget overload and lets you maintain a functional bathroom while work progresses. Start with immediate safety interventions that take hours rather than days, move to medium-complexity projects requiring limited downtime, then schedule major renovations when you can arrange temporary bathing facilities.
Your safety-first phase addresses fall risks immediately. Install grab bars beside the toilet and in the shower within the first week. Add non-slip mats or adhesive strips to the tub and shower floor. Replace standard bulbs with brighter LED fixtures if current lighting creates shadows. These upgrades cost a few hundred dollars, require basic tools, and dramatically reduce injury risk while you plan larger changes.
Medium-term projects improve daily function without major disruption. Replace round doorknobs with lever handles, swap standard faucets for single-lever or touchless models, and install a handheld showerhead. Add a shower bench or transfer seat. These modifications typically happen over two to three months as budget allows and can be scheduled around your household routine since the bathroom remains usable throughout.
Save major renovations for when you’ve secured funding and can access an alternative bathroom. A typical phased timeline looks like this:
- Month 1: Install grab bars, non-slip treatments, improved lighting
- Months 2-3: Upgrade hardware, add shower seat, install motion-sensor night lights
- Months 4-6: Research contractors, apply for grants, finalize barrier-free shower design
- Months 6-12: Complete structural work like doorway widening, curbless shower installation, or full layout reconfiguration
This staged approach keeps your bathroom safe and functional at every stage while spreading costs across your budget timeline. Prioritize projects that address your specific mobility challenges first rather than following a generic sequence.
Essential Accessible Features for Everyday Use
Grab Bars and Support Rails
Grab bars differ fundamentally from towel bars. A true safety grab bar must support at least 250 pounds and attach directly to wall studs or blocking, not just drywall. Decorative towel bars will pull out under weight, creating serious fall risk.
Install horizontal grab bars 33 to 36 inches above the floor beside the toilet, positioned to assist with sitting and standing transfers. For shower and tub areas, place bars on the longest wall at similar height, extending beyond the entry point. A vertical bar near the bathroom entrance helps with balance during transitions, mount it 48 to 52 inches high on the latch side of the door.
Spacing matters for safety. Grab bars should be 1.5 inches from the wall to allow a secure grip. In showers, position them where you’ll naturally reach when entering, soaping, or rinsing, typically on the control wall and opposite wall.
Consider textured or ridged surfaces for better grip when wet. Stainless steel and powder-coated options resist corrosion in humid environments. For Kitchener homeowners with arthritis or limited hand strength, bars with larger diameters (1.5 inches versus 1.25 inches) may provide easier gripping.
Non-Slip Surfaces and Better Lighting
Falls in bathrooms cause thousands of preventable injuries each year, but the right surfaces and lighting dramatically reduce this risk. Choose flooring with a Dynamic Coefficient of Friction (DCOF) rating of 0.42 or higher when wet, porcelain or ceramic tiles with textured finishes work well, as do vinyl products specifically rated for wet areas. Avoid glossy tiles that become slippery when damp.
Inside showers, apply anti-slip treatments to existing surfaces or install textured shower pans. Suction bath mats provide temporary non-slip coverage but must be cleaned regularly and checked for secure attachment, dried soap residue reduces their grip.
Lighting prevents falls by improving depth perception and obstacle visibility. Install bright LED fixtures that eliminate shadows where people transfer in and out of the tub or shower. Position lights above the mirror and near the toilet to remove dark corners. Motion-sensor night lights guide those who use the bathroom at night without fumbling for switches, particularly helpful for individuals with vision changes or those taking medications that affect balance. Aim for at least 75 foot-candles of light in task areas, significantly brighter than standard bathroom lighting. Combine multiple light sources rather than relying on a single overhead fixture.
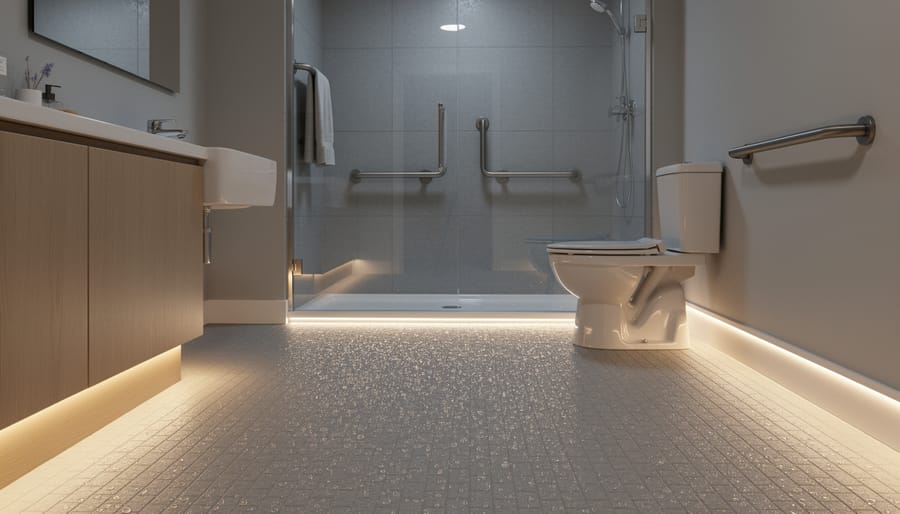
Barrier-Free Shower and Bathing Solutions
A barrier-free shower eliminates the biggest obstacle to safe bathing: the step-over threshold. Walk-in showers with flush or low-profile thresholds (under 1/2 inch) allow wheelchair access and reduce fall risk for anyone with balance issues, arthritis, or recovering from hip or knee surgery. The continuous floor surface means you don’t have to lift your legs high, which matters when chronic pain or stiffness makes that movement difficult.
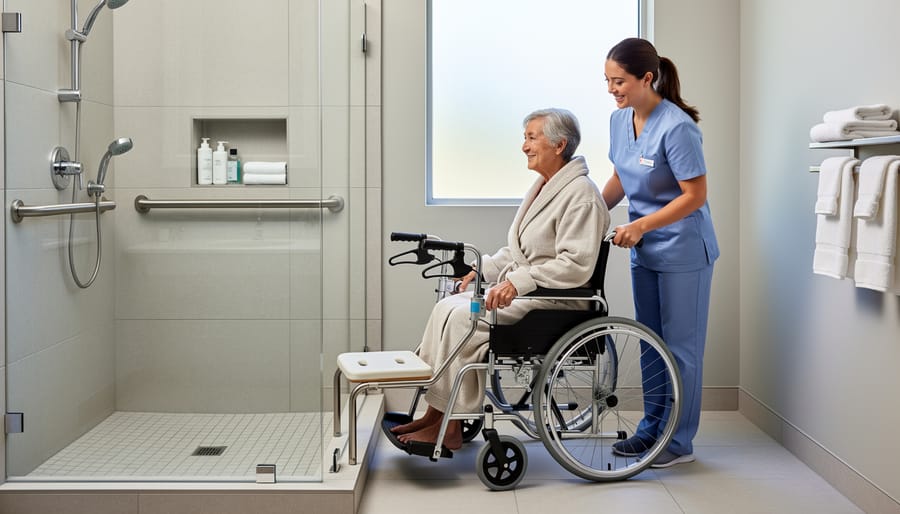
Transfer benches bridge the gap between standing and seated bathing. They extend from inside the shower to outside, letting you sit first, then slide across rather than stepping over a wet edge. For those managing conditions like multiple sclerosis or post-stroke weakness, this method maintains independence without requiring caregiver assistance for every shower.
Handheld showerheads mounted on adjustable-height slide bars accommodate both seated and standing use. You control water direction without awkward reaching or twisting, which protects joints and prevents strain. Pair them with thermostatic mixing valves that cap maximum water temperature at 49°C to prevent scalding burns, a real risk when reduced sensation or slower reaction times are factors.
These solutions don’t just enable bathing; they preserve the dignity and routine that support mental health and infection prevention through consistent hygiene.
How to Verify Your Upgrades Are Safe and Effective
After installation, thorough verification ensures your accessible bathroom upgrades actually deliver the safety and independence they promise. Testing should involve the person who’ll use the space most, or someone who can realistically simulate their mobility constraints.
Start with a hands-on grab bar stability test. Grasp each bar firmly and apply your full body weight, pulling from multiple angles, not just straight down, but also sideways and at diagonal vectors that mimic how someone catching themselves during a slip would grab. The bar shouldn’t shift, creak, or show any movement at the mounting points. If you notice flex in the wall itself, the installation likely missed a stud or blocking and needs immediate correction by a professional.
Next, test slip-resistance under realistic conditions. Wet the floor and shower surfaces thoroughly with warm water, then carefully walk across them barefoot and in typical footwear. The surface should provide noticeable grip, not feel slick. Spray body wash or shampoo in the shower area and rinse, some products create more residue than plain water, revealing hidden slip hazards.
Verify lighting at different times of day, especially early morning and evening when many people use the bathroom. Can you clearly see grab bars, controls, and potential obstacles without shadows obscuring critical areas? Motion-sensor lights should activate reliably when you enter.
Conduct mock transfers to test real-world functionality. Sit on the toilet and reach for grab bars, are they positioned where you’d naturally grasp them? From a seated position on a shower bench, can you comfortably reach faucet controls, the handheld showerhead, and soap without overextending? Stand up from sitting and reverse the movement several times to confirm the supports work through the full range of motion.
Check that all controls operate smoothly from both seated and standing positions. Lever faucets should require minimal force, and temperature adjustments shouldn’t demand awkward twisting or reaching that could throw someone off balance.
Next Steps: Maintaining Your Accessible Bathroom
Installing accessible features is just the beginning. Regular maintenance keeps your bathroom safe and functional as your needs evolve.
Inspect grab bars every three months. Tug firmly to check mounting stability and look for wall cracks, loose screws, or corrosion around fixtures. Tighten hardware immediately if you notice any movement. Water exposure gradually weakens wood studs and drywall anchors, so what felt secure last year might need reinforcement now.
Clean non-slip surfaces with pH-neutral cleaners rather than harsh chemicals that break down textures. Vinegar solutions work well for tile without stripping slip-resistant coatings. Replace bath mats when suction cups no longer grip firmly or when the textured surface feels smooth.
Check caulking around the shower base, tub edge, and sink quarterly. Gaps let moisture seep behind walls, creating mold that triggers respiratory problems and structural damage. Recaulk at the first sign of cracking or separation.
Reassess your mobility needs annually or after any health changes. Balance, strength, and vision shift over time. What works today might need adjustment next year. Schedule regular reviews with your occupational therapist to catch emerging needs before they become safety risks.
Accessibility is not a destination. It requires ongoing attention to protect both your independence and your health.
Common Questions About Accessible Bathroom Planning
How much do accessible bathroom upgrades typically cost?
Basic safety upgrades like grab bars and non-slip mats run $200-800, while mid-range projects such as walk-in showers cost $3,000-8,000. Complete barrier-free renovations in Kitchener typically range from $10,000-25,000 depending on space size and structural changes required.
Will accessible features hurt my home’s resale value?
No. Well-designed accessible bathrooms typically increase property value because they appeal to aging homeowners, multi-generational families, and buyers planning long-term residence. Universal design features now rank among top buyer preferences in Canadian real estate markets.
Can accessible bathrooms still look modern and attractive?
Absolutely. Today’s grab bars come in brushed nickel, oil-rubbed bronze, and matte black finishes that match contemporary fixtures. Curbless showers with frameless glass create a spa-like aesthetic while remaining fully accessible, and many universal design elements are indistinguishable from standard luxury upgrades.
What options exist for renters who need accessible bathrooms?
Renters can install temporary solutions like suction-cup grab bars, removable raised toilet seats, transfer benches, and non-permanent non-slip strips. Discuss permanent modifications with your landlord, as Ontario human rights legislation may require reasonable accommodation for tenants with disabilities.
The timeline for accessible bathroom projects varies considerably. Simple upgrades like installing grab bars and replacing hardware take one to three days, while a barrier-free shower conversion typically requires one to two weeks including plumbing work and tile finishing. Complete bathroom renovations with doorway widening and layout changes may extend three to six weeks, though you can often arrange phased work to maintain some bathroom access throughout.
These investments support healthy aging by creating an environment where people can safely maintain their hygiene routines regardless of changing abilities. The upfront planning effort pays dividends in reduced injury risk and sustained independence for years or decades ahead.
Accessible bathroom planning is more than a renovation project. It’s a proactive health investment that protects your independence, prevents injuries, and enhances quality of life for years to come. Whether you’re managing a chronic condition, supporting an aging family member, or simply planning ahead, these upgrades create a safer environment that reduces fall risk and supports wellness-based aging at every stage of life.
Start with a professional assessment from an occupational therapist or certified aging-in-place specialist who can identify your specific needs and prioritize the most impactful changes. Focus on safety features first, grab bars, non-slip surfaces, and improved lighting deliver immediate protection. Then build from there as budget and circumstances allow.
Remember that accessible design benefits everyone who uses your bathroom, not just those with current mobility challenges. Children, guests recovering from surgery, and anyone carrying items all gain from thoughtful, universal design. Your Kitchener home becomes a space that adapts to life’s changes rather than limiting them, supporting true independence in the place you want to be.