
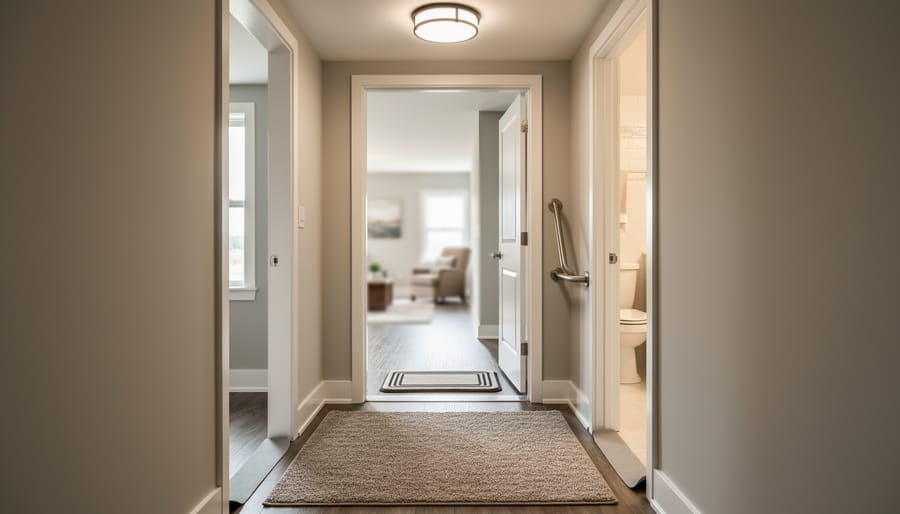
Falls at home are preventable when you systematically identify and eliminate hazards in each room, a process that typically takes one weekend and requires minimal tools or expense. Most falls happen not because of a single dangerous feature, but because multiple small risks compound over time: loose rugs, dim lighting, clutter in walkways, and missing grab bars all create opportunities for injury.
The good news is that home modifications for fall prevention don’t require a major renovation. Research shows that addressing lighting, securing flooring, installing handrails, and removing obstacles significantly reduces fall risk, particularly for older adults who spend most of their time at home. These changes work because they target the environmental factors that most commonly contribute to falls rather than attempting to prevent every possible scenario.
This guide walks you through a room-by-room assessment of your home, starting with the highest-risk areas like bathrooms and stairways, then moving to bedrooms, kitchens, and common spaces. You’ll learn exactly what to look for, which modifications to prioritize, and how to verify that your changes actually improve safety. Whether you’re making your own home safer as you age or helping a parent maintain independence, the step-by-step approach ensures you address the hazards that matter most without overlooking critical details.
What You’ll Need: Essential Tools and Materials for Home Modifications
You don’t need to purchase everything at once or transform your entire home overnight. Start with the supplies that address your most pressing safety concerns, then add others as you work through each room.
Basic Assessment and Installation Tools
Before making any modifications, you’ll need a few simple tools: a measuring tape to check doorway widths and assess furniture spacing, a stud finder if you’re installing grab bars or handrails, a cordless drill with appropriate bits for your wall type, a level to ensure handrails are straight, and a flashlight or headlamp to identify poorly lit areas. Most homeowners already have these items, and they’re useful for many household tasks beyond fall prevention.
Safety Equipment by Modification Type
- Lighting improvements: LED nightlights with motion sensors, higher-wattage bulbs for existing fixtures, plug-in pathway lights, and battery-operated stick-on lights for closets and cabinets
- Flooring and surface safety: Non-slip bath mats with suction cups, non-slip rug pads or double-sided carpet tape, anti-slip tape for step edges, and floor marking tape in contrasting colours
- Bathroom modifications: Grab bars rated for your weight (check package specifications), shower chair or transfer bench, raised toilet seat if needed, and a handheld showerhead with adjustable mount
- Stairway safety: Handrail brackets and mounting hardware, reflective or high-contrast tape for step edges, and additional light fixtures with switches at both stair ends
- General stability aids: Step stool with handrail for kitchen use, furniture pads to prevent slipping, and cord organizers to secure electrical cables along baseboards
The total investment varies widely depending on your home’s current condition and your specific needs. Some items like nightlights and non-slip mats cost just a few dollars, while grab bars and professional installation can run higher. Many communities offer assistance programs that provide free safety equipment or subsidized installation for seniors, check with your local public health unit or community services organization.
Important Safety Considerations Before You Begin
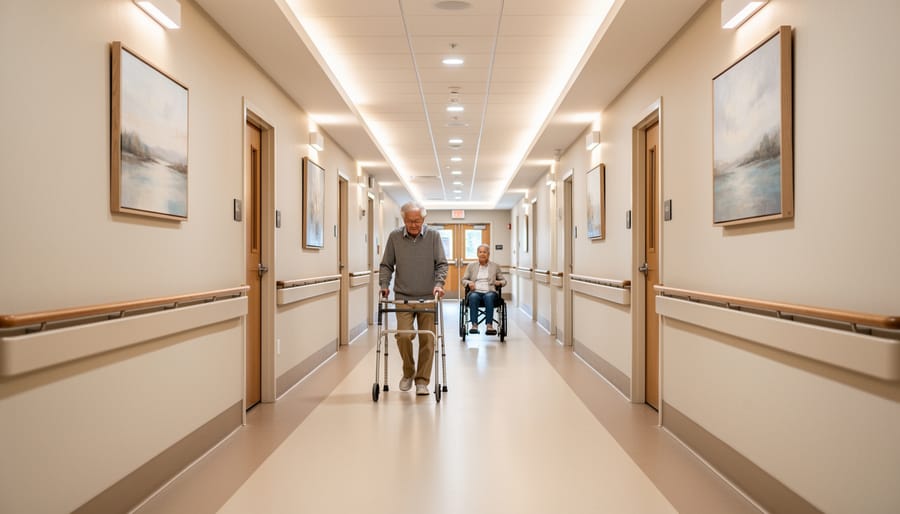
Before you start making changes to your home, understand when you need expert help and how to protect yourself during the modification process. Even well-intentioned safety improvements can create new hazards if done incorrectly.
Grab bar installation requires proper wall anchoring into studs or blocking to support body weight during a fall. A poorly installed grab bar that pulls away from the wall creates a serious injury risk. If you’re uncertain about wall construction, hire a handyperson or contractor. The same applies to electrical work beyond simple plug-in nightlights, adding outlets, hardwired lighting, or switches requires a licensed electrician.
Check weight ratings on all safety equipment before purchasing. Grab bars, shower chairs, raised toilet seats, and step stools should accommodate the user’s weight with a safety margin. Equipment rated for 250 pounds won’t reliably support someone who weighs 240 pounds.
Renters must get landlord approval before making permanent modifications like installing grab bars or changing light fixtures. Many landlords will approve safety improvements, especially if you offer to restore the original condition when moving. Keep communication in writing.
Consider consulting an occupational therapist for a professional home assessment. They identify hazards you might miss and recommend modifications specific to your mobility patterns and health conditions. Many extended health plans cover occupational therapy assessments.
Finally, ironically, some falls happen during DIY safety projects. Work with a partner when possible, use stable ladders, and don’t overreach or rush.
Step-by-Step: Making Each Room Safer
Entryways and Hallways
Start at the front door and work your way through each hallway in your home. Walk the route slowly, looking for anything that could catch your foot or cause you to stumble.
Remove area rugs entirely or secure them with proper non-slip rug pads that grip both the floor and the rug backing. The thin rubber mesh versions sold at dollar stores rarely work, invest in quality pads that cover the full rug area. If a rug curls at the edges or slides when you step on it, get rid of it.
Install lighting that eliminates dark patches. Motion-sensor lights work well for nighttime trips to the bathroom, they activate before you fumble for a switch. Place light switches at both ends of long hallways so you never walk through darkness to reach one. If outlets are available, plug-in motion sensor nightlights are an easier alternative to hardwired fixtures.
Clear everything off the floor. Shoes, bags, pet toys, and extension cords all create tripping hazards. Hallways need a minimum clear width of 36 inches for safe passage, wider if you use a walker or wheelchair. Measure your narrowest hallway and move any furniture that intrudes into this space.
Check for single steps or level changes in entryways and mark them with bright contrasting tape along the edge. Many falls happen at these unexpected transitions. If your entryway has steps and no handrail, install one. Even a short two-step entry benefits from a rail to grab.
Living Areas and Bedrooms
Start by walking through your living room and bedroom with fresh eyes, imagine navigating these spaces with reduced vision or unsteady balance. Clear a path at least 90 centimetres wide between furniture pieces, removing side tables, ottomans, or decorative items that narrow walkways. Rearrange seating so you can move from the bedroom to the bathroom without weaving around obstacles.
Electrical cords create invisible trip hazards, especially in low light. Run them along baseboards and secure them with cord covers or clips rather than letting them cross pathways. If a lamp cord must cross a walking area, consider relocating the furniture or switching to battery-powered lighting.
Move frequently used items, the television remote, reading glasses, medications, to surfaces between waist and shoulder height. Eliminate the need to bend low or stretch high for everyday objects. Check your bed height by sitting on the edge: your feet should rest flat on the floor with knees at roughly 90 degrees. Too low makes standing difficult; too high increases fall risk when getting in or out. Add risers or remove them as needed.
Place a lamp or touch-activated light within arm’s reach of your bed so you never navigate in darkness. Remove low coffee tables, footstools, and magazine racks that are easy to overlook and trip over, especially during nighttime bathroom trips when you’re less alert.
Bathrooms
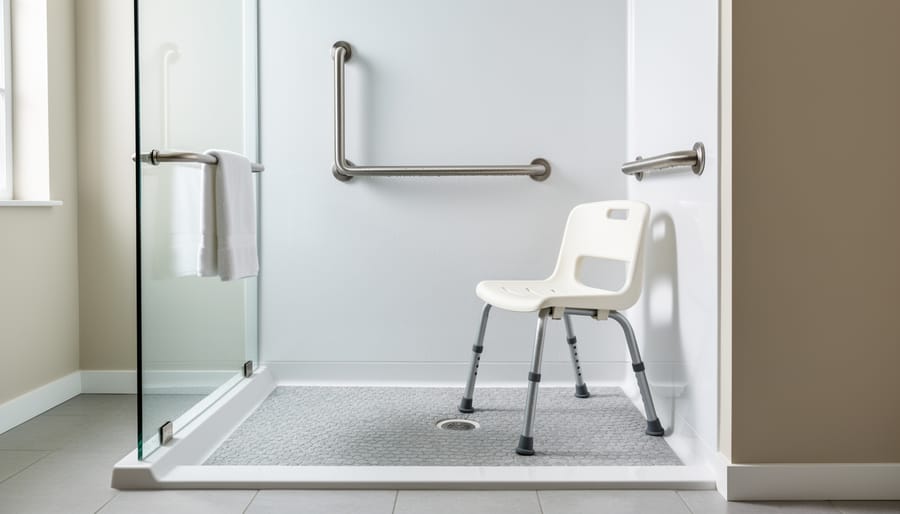
Bathrooms present the highest fall risk in most homes due to wet surfaces and frequent transfers between sitting and standing. Start by installing grab bars, these require proper anchoring into wall studs to support your full weight during a slip. Position one near the toilet for safe transfers and another inside the shower or tub. If you’re unsure about stud locations or proper installation technique, hire a professional rather than risk a weak mount.
Place non-slip mats both inside your shower or tub and on the floor outside where you step out. These mats should have suction cups underneath that grip securely. Test them weekly by tugging firmly to ensure they haven’t loosened.
Add a shower chair or transfer bench if standing for extended periods feels unsteady. This simple addition lets you bathe while seated, eliminating the balance challenge of standing on wet surfaces.
Improve lighting with bright bulbs over the mirror and shower area. You should see clearly without shadows, especially when the room is steamy.
Remove any lock that requires a key or could trap someone inside. Replace it with a privacy lock that can be opened from outside in an emergency. If balance issues make toilet use difficult, consider a raised toilet seat that reduces the distance you need to lower and raise yourself.
Staircases
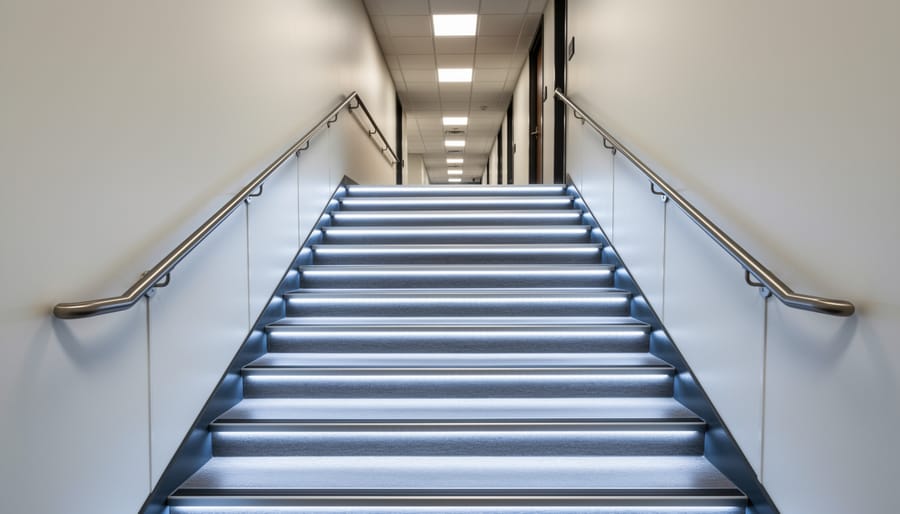
Stairs account for a significant proportion of home falls, particularly when lighting is poor or handrails are missing. A methodical approach to stairway safety can dramatically reduce this risk.
Start by assessing your handrails. Both sides of the staircase should have sturdy rails that extend the full length of the stairs, including beyond the top and bottom steps. Test each rail by gripping it firmly and applying pressure, it shouldn’t wobble or shift. If your staircase only has one handrail, adding a second rail on the opposite side provides crucial support, especially for those with balance issues or weakness on one side.
- Install or reinforce handrails on both sides of the staircase, ensuring they’re securely anchored and extend beyond the top and bottom steps.
- Add lighting fixtures at both the top and bottom of the staircase with three-way switches at each end, so you never have to navigate stairs in darkness.
- Apply contrasting colour tape to the edge of each step, making the step height clearly visible.
- Remove all stored items, decorations, and clutter from the stairs and adjacent areas.
- Secure any loose carpet, runners, or stair treads, trimming frayed edges and ensuring no material bunches or lifts.
Check that carpet or non-slip treads are firmly attached with no loose edges that could catch a foot. Any worn or damaged materials should be repaired or replaced immediately. Keep the stairs completely clear, resist the temptation to leave items “just for a moment” on steps.
Kitchen
Start by reorganizing your kitchen storage so that everyday dishes, glasses, and food items sit between waist and shoulder height. This simple change eliminates the need to reach overhead or bend down repeatedly, which are two of the most common positions that lead to loss of balance while cooking.
If you must access higher shelves occasionally, invest in a sturdy step stool with a handle or support bar. Avoid using chairs or boxes as improvised step stools, as they can easily tip or slide. Keep the step stool stored in the kitchen so it’s always available when needed.
Spills create immediate slip hazards on kitchen floors. Wipe them up as soon as they happen, and keep cleaning supplies within easy reach under the sink. Pay special attention to areas around the stove and refrigerator where spills occur most frequently.
Install bright task lighting over countertops, the stove, and the sink. Under-cabinet LED strips work well and provide focused light exactly where you’re working. Good lighting helps you see potential hazards like water on the floor or items left on the counter.
Anti-fatigue mats with non-slip backing can provide cushioning if you stand for extended periods, but ensure they lie completely flat with no curled edges that could catch your foot. Secure all appliance cords along walls or behind counters rather than letting them drape across walkways where they become tripping hazards.
Outdoor Spaces
Start by inspecting your walkways and steps for cracks, heaving, or uneven surfaces, these create serious trip hazards. Fill small cracks with concrete patch or replace damaged pavers. If sections have settled or shifted significantly, hire a contractor to level them properly.
Lighting transforms outdoor safety after dark. Install fixtures that illuminate every path, entrance, and step without creating glare or deep shadows. Motion-sensor lights work well for driveways and side entrances, turning on automatically when you approach. Place switches inside near doors so you can light your path before stepping outside.
In winter, clear snow and ice from walkways immediately after storms. Keep a sturdy ice scraper and bag of sand or ice melt near your door. Apply sand to slippery spots rather than salt alone, which loses effectiveness in extreme cold and can damage surfaces.
Keep pathways clear year-round. Coil and store garden hoses after use, put tools away promptly, and trim overgrown plants that encroach on walking areas. If your outdoor steps lack handrails, add them, they provide crucial stability on sloped or uneven terrain and cost far less than treating a fall injury.
How to Test Your Modifications and Know They’re Working
Testing your modifications is the only way to know if they truly reduce fall risk in daily life. Walk through each room using the same mobility aids you or your family member typically rely on, moving at a realistic pace rather than rushing. Try navigating in low light conditions to simulate evening or early morning scenarios when falls often occur.
Grab bars should not wiggle or shift under firm pressure. If you can pull one away from the wall even slightly, it needs proper reinstallation into wall studs. Non-slip mats should grip the floor securely when you step on them from different angles.
Pay attention to your behavior patterns. Hesitating before entering a room, gripping furniture for support while walking, or avoiding certain areas entirely signals that modifications are incomplete. Near-misses matter too, if you catch yourself stumbling in the same spot repeatedly, that location needs further attention. Some families dealing with cognitive changes like Alzheimer’s early signs find mobility challenges increase without obvious physical causes, making environmental safety even more critical. Watch for changes in confidence and independence levels, which indicate whether modifications are working as intended. If cognitive symptoms appear alongside mobility concerns, these are important warning signs to notice today and discuss with healthcare providers.
Ask someone else to walk through your home with fresh eyes. They will spot hazards you have learned to unconsciously avoid.
When to Reassess and What to Do Next
Fall prevention isn’t a one-time project. Your home’s safety needs will change as you age, and regular reassessment helps you stay ahead of new risks. Plan to review your modifications at least once a year, and immediately after any significant changes, a new diagnosis, medication adjustments, a hospital stay, or noticeable changes in balance or mobility.
During your reassessment, walk through each room with fresh eyes. Are there new obstacles? Have you started avoiding certain areas because they feel unsafe? These warning signs mean it’s time for updates. Consider scheduling a professional home assessment with an occupational therapist, who can identify risks you might miss and recommend specific modifications for your changing needs.
Talk to your doctor about fall prevention during routine visits, especially if you’ve experienced any near-misses or changes in balance. They can review medications that might increase fall risk and refer you to appropriate specialists.
Look into community programs through your local health authority or seniors’ centre, many offer free home safety equipment, installation assistance, or subsidized modifications. Medical alert systems provide additional security, especially if you live alone. Taking these steps keeps you proactive rather than reactive, maintaining your independence safely.
Common Questions About Home Fall Prevention
How much do fall prevention modifications typically cost?
Basic modifications like non-slip mats, nightlights, and contrast tape cost under $100 total. Grab bars professionally installed run $100-300 per bar, while more extensive changes like bathroom renovations can reach several thousand dollars. Most homes see significant safety improvements with an initial investment of $200-500.
Are there grants or programs available in Canada to help with costs?
Several provinces offer home modification programs through health authorities or community services for seniors and people with disabilities. The Veterans Independence Program covers eligible veterans, and some private insurance plans include home safety equipment. Contact your local community health centre or provincial aging services office to learn about available assistance in your area.
Do I need to modify my entire home at once?
No. Start with the bathroom and stairs since these areas present the highest risk, then address other rooms as budget and time allow. Many people tackle one room per month, which spreads out costs and makes the process less overwhelming.
What modifications provide the biggest safety improvement?
Bathroom grab bars, improved lighting throughout the home, and removing tripping hazards like loose rugs deliver the most significant risk reduction. These three changes address the most common fall scenarios and work together to create safer movement patterns.
Can I make changes in a rental property?
Many modifications like lighting, non-slip mats, and furniture arrangement don’t require landlord approval. For permanent installations like grab bars, discuss options with your landlord, some will allow modifications if you agree to professional installation or restore the property when moving. Portable grab bars using suction or tension work as temporary alternatives.
When should I consider moving to a more accessible home?
Consider relocating if your current home requires extensive structural changes that aren’t feasible, has multiple levels that are becoming difficult to navigate, or if you’re spending more on modifications than the home’s remaining value to you. A single-level home with an accessible bathroom often proves more practical than costly renovations to a multi-storey house.
Remember that fall prevention is an ongoing process rather than a one-time project. Your needs may change over time, and what works now might need adjustment later. Stay connected with your healthcare provider and consider scheduling a professional home safety assessment every few years to identify new concerns before they become problems.